

Set up a project
Setting up a project takes about ten minutes. Most of that is writing good instructions, and that time pays back in every conversation anyone has in the project.
1. Create the project
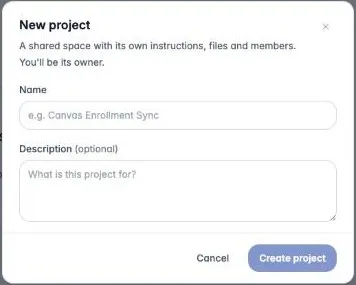
Section titled “1. Create the project”Open Projects and choose New project. Give it a name people will recognize in the sidebar, and a one-line description of the goal. You become its owner.
2. Write the instructions
Section titled “2. Write the instructions”Open Instructions in the project’s settings rail. Instructions are what the assistant is told at the start of every conversation, for every member. Treat them as a standing brief: who the assistant works for, which documents are authoritative, how answers should be laid out, and what it must never do.
A good brief covers four things:
- Role and context. “You are the contract-review assistant for the Office of Sponsored Programs, working on the Cascadia research agreement.”
- Sources of truth. “Always compare sponsor language against the negotiation playbook in the project files, and cite the section.”
- Output format. “Go clause by clause. Classify each change as ACCEPT, COUNTER or ESCALATE, and give paste-ready contract language.”
- Hard rules and routing. “Never accept terms the playbook marks non-negotiable. Say who on the team should handle questions outside contract terms.”
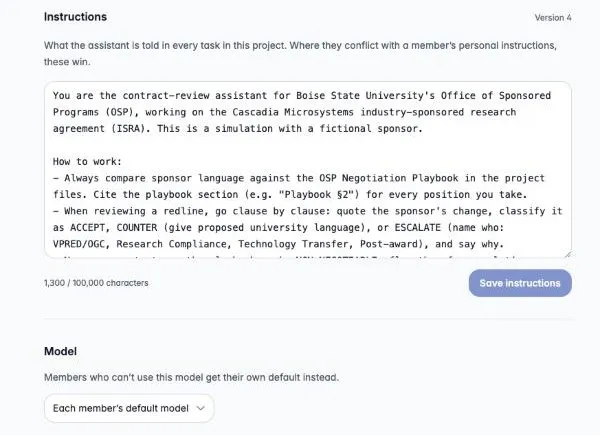
Every save that changes something becomes a new version. See History.
3. Choose a model, tools and skills
Section titled “3. Choose a model, tools and skills”Each of these is its own row in the rail:
- Model. Leave it on Each member’s default model, or pin one model for the whole team. Anyone who can’t use the pinned model gets their own default instead.
- Tools. Turn on only what the work needs. Each tool’s description is
shown, and you can only add tools you can use yourself. Useful
combinations:
- Contract or policy work: Word Documents (so the assistant can produce
a redlined
.docx), Policy Search, Clarifying Questions. - Budgets and numbers: Calculator, Analyze Spreadsheet, Excel Spreadsheets.
- Reports and briefings: Word Documents, PowerPoint Presentations, Charts & Graphs.
- Contract or policy work: Word Documents (so the assistant can produce
a redlined
- Skills. Add any skills the team relies on.
If a member doesn’t have access to one of the project’s tools, skills, its model or its memory, their conversations still run without it, and a notice above the composer says what was left out.
4. Add the files the assistant should work from
Section titled “4. Add the files the assistant should work from”Open Files and choose Add files. PDF, Word, PowerPoint, Excel, CSV, Markdown, HTML and plain text are accepted. Everyone in the project can open these files, and the assistant searches them to answer anyone in the project. The page reminds you how many people that is.
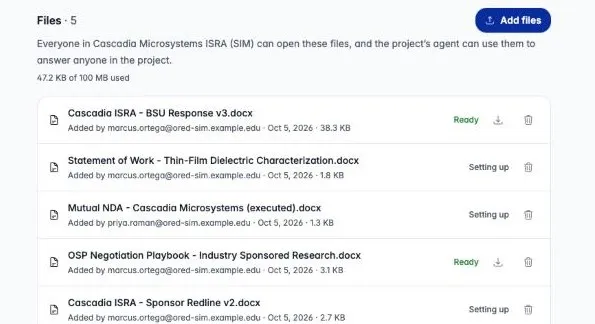
Each file shows who added it and a status:
- Setting up / Uploading: the file is being prepared. The assistant can’t use it yet.
- Ready: the assistant can search it, and open it by name.
A project’s first upload also creates its search index, so the first files can take a little longer than later ones. Files added together are prepared side by side, and are usually Ready within a few minutes.
The assistant reaches Files two ways. For every message it finds the passages that best match your wording on its own. It can also list what is in Files and read a whole file when you name it: “read submission-07.docx”, “grade each Week 3 paper against the rubric”, “compare the sponsor’s v2 redline with our v3”. Name the file when you want work on one document rather than a search across all of them. Spreadsheets, presentations and images can be listed but not opened this way; attach those to the conversation instead.
What to put in Files:
- Reference material everyone needs: playbooks, policies, templates, executed agreements, the statement of work.
- Redlines the whole team works from, such as the other side’s latest draft. See Word redlines in Files.
- One current version of each document. Delete superseded drafts so the assistant doesn’t quote an old one.
Word redlines in Files
Section titled “Word redlines in Files”The assistant reads files as plain text. When a Word document has tracked changes, each change is written out with a marker before the file is indexed, so the assistant can tell what the author struck from what they added:
…a fixed price of $184,500, [deleted: fifty percent (50%) upon execution …net thirty (30) days][inserted: payable in full within ninety (90) days afterSponsor's written acceptance …]A note at the top of the indexed text names the authors of the changes and
explains that keeping the insertions and dropping the deletions gives the
proposed text, so you can ask for either reading. Word comments in a redline
are kept too, as [comment by <author>: …] at the point they refer to.
Formatting-only changes aren’t marked.
5. Invite your team
Section titled “5. Invite your team”Open Members. In Add people, type a name or email, or paste a list of emails, and pick a role. Invalid addresses and people who are already members are reported back to you. Anyone you add gets a notification (the bell next to your name in the sidebar), and the project appears in their Projects list.
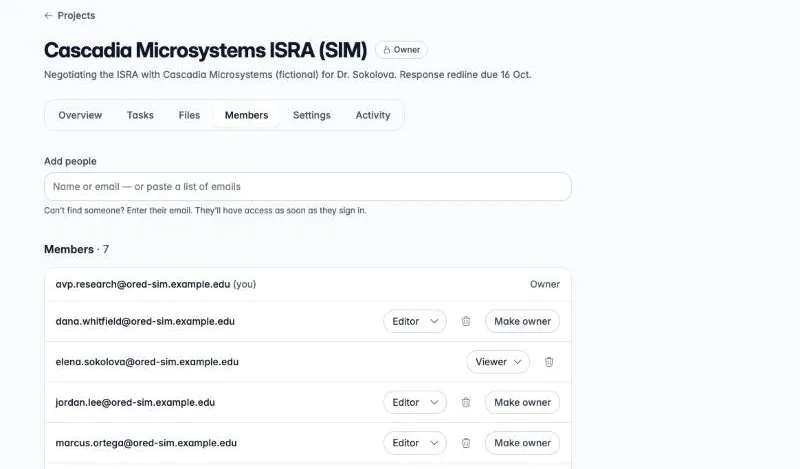
- Change a role with the role picker next to a person’s name, or remove them with the trash icon.
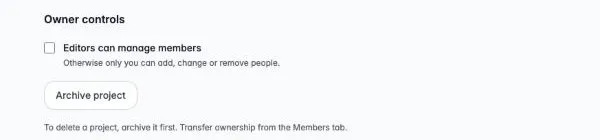
- By default, editors can manage members too. To keep that to yourself, clear Editors can manage members on the Members page.
6. Seed the project memory
Section titled “6. Seed the project memory”Before the team starts, give the assistant the facts everyone should share: key dates, who owns which part, decisions already made. Start a conversation and ask:
Please record these kickoff facts in the shared project memory so everyone on the team sees them: our response is due 16 October; Marcus drafts the response; Priya owns export control; Tom owns IP.
The assistant saves them and adds a line to the project memory index, which is what every teammate’s conversation starts from. See Project memory.